The key to a family-safe pool deck is not just choosing a light-colored material, but engineering a complete system that manages heat, water, and transitions with precision.
- Material coolness depends more on porosity and thermal mass (like travertine) than color alone.
- Safety is quantifiable: look for a Dynamic Friction Coefficient (DCOF) of 0.60+ for wet areas and eliminate any height difference over 1/4 inch between surfaces.
Recommendation: Prioritize materials with proven heat-dissipating properties and slip-resistance ratings, then ensure installation focuses on seamless transitions and correct drainage slopes to prevent hazards.
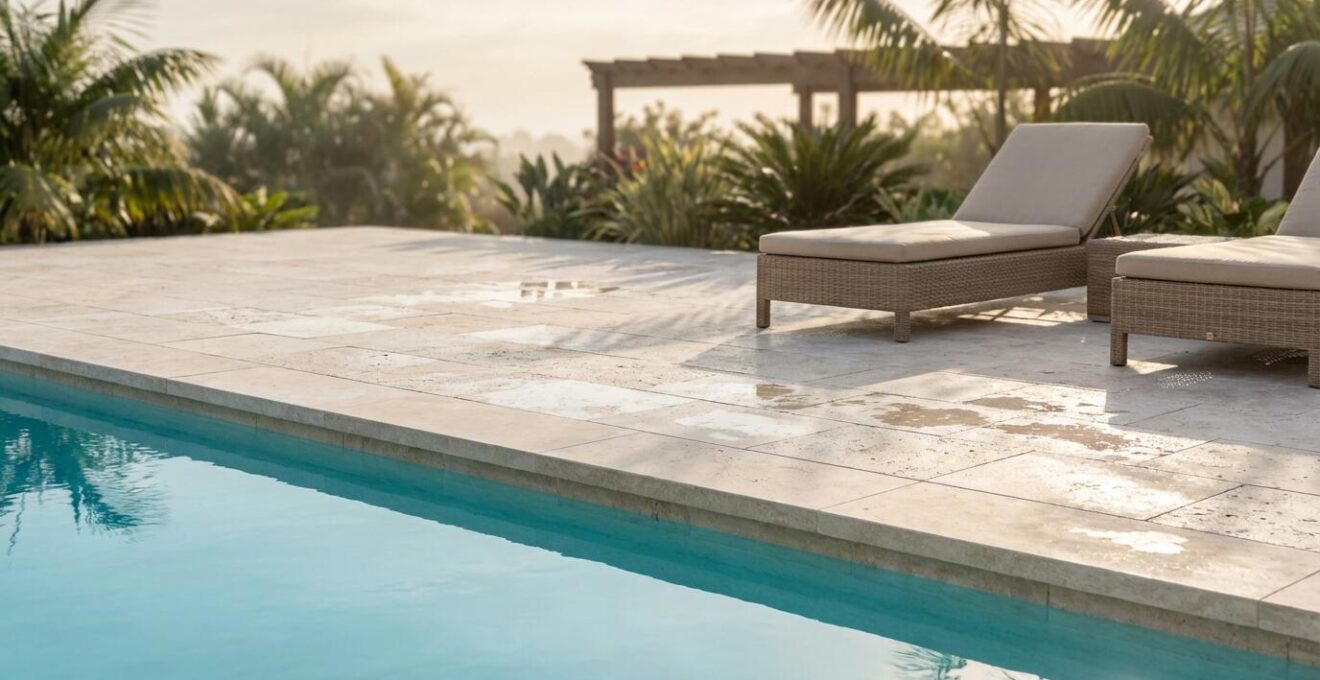
The perfect summer day often revolves around the swimming pool, a scene of laughter and splashing. Yet for many families, this idyllic picture is shadowed by a constant, low-level anxiety: the scorching hot surface of the pool deck that can burn tender feet in seconds, or the slick, treacherous tile that threatens a fall with every misplaced step. The joy of a seamless transition from the cool grass to the refreshing water is often interrupted by these very real hazards, turning a space of relaxation into one of constant vigilance, especially with young children or pets.
Common advice often oversimplifies the solution, suggesting you merely “choose a light-colored paver.” While color plays a role, this guidance barely scratches the surface. A truly safe and comfortable pool deck is not a standalone feature but a high-performance system. The real key to a barefoot-friendly oasis lies in understanding the science behind the materials, the engineering of the transitions, and the physics of water management. It’s about looking beyond the surface appearance to the underlying properties that define safety and comfort.
This guide moves beyond generic tips to provide a specialist’s perspective. We will deconstruct the pool deck into its critical components, revealing why some materials become dangerous when wet and others stay remarkably cool. We will explore the precise construction techniques required to prevent trip hazards and frost damage, and establish clear guidelines for designing a space that is both beautiful and fundamentally safe. You will learn to think about your hardscaping not as a simple patio, but as an integrated system designed for your family’s well-being.
This article provides a comprehensive roadmap for making informed decisions. By understanding the principles behind material selection and installation, you can create a poolside environment that truly allows for carefree enjoyment all summer long. The following sections break down each critical consideration.
Summary: A Deep Dive into Cool and Safe Poolside Hardscaping
- Why generic tiles become dangerous ice rinks when wet?
- Why Travertine Stays Cooler Than Granite on Hot Summer Days?
- Wood or Stone: Which Transition Material Best Connects Grass to Water?
- How to Eliminate Trip Hazards Between the Coping and Decking?
- How to bond coping stones to the shell to prevent frost heaving?
- The slope error that sends dirty runoff water back into your clean pool
- When to widen the pool deck: Guidelines for accommodating loungers and walkways
- How to Create a Biophilic Transition That Hides Equipment Without Blocking Access?
Why generic tiles become dangerous ice rinks when wet?
The primary reason generic interior tiles are dangerously slippery around a pool is their lack of a sufficient surface texture designed for wet, barefoot conditions. Safety in these areas is measured by a standard called the Dynamic Friction Coefficient (DCOF). This rating quantifies how much grip a surface provides when wet. While a tile might feel fine when dry, its smooth, glazed surface allows a thin film of water to form between the sole of a foot and the tile, creating a hydroplaning effect similar to a car tire on a wet road.
For residential and commercial pool areas, safety isn’t a suggestion; it’s a measurable requirement. Industry standards are clear on this point, as safety experts recommend a minimum DCOF of 0.60 for swimming pool decks to be considered safe. Many standard ceramic or porcelain tiles, especially those with a polished finish, fall well below this threshold. Their low porosity means water beads on the surface instead of being absorbed or channeled away, exacerbating the slip risk.
In contrast, materials specifically designed for outdoor, wet use feature finishes that actively combat this risk. Look for terms like “brushed,” “shot-blasted,” or “flamed,” which describe manufacturing processes that create a microscopic textured surface. This texture breaks the surface tension of water, allowing for direct contact between foot and paver and maintaining grip. For instance, European standards like DIN 51097 offer specific “B” or “C” classifications for barefoot areas, providing a much more reliable indicator of safety than standard shoe-based ratings. As an example of stringent international standards, Spain required wet Pendulum Test Values (PTV) greater than 45 to model bare feet, ensuring a high level of safety in public and private pools.
Why Travertine Stays Cooler Than Granite on Hot Summer Days?
The remarkable ability of travertine to stay cool to the touch, even under a blistering summer sun, is not magic—it’s physics. The difference between a comfortable travertine deck and a scorching granite one comes down to two key properties: porosity and thermal mass. Granite is a dense, igneous rock with very low porosity. Its tightly packed crystalline structure is excellent at absorbing and storing solar energy (heat). This high thermal mass means it heats up steadily throughout the day and, more importantly, retains that heat for a long time, releasing it slowly even after the sun has set.
Travertine, on the other hand, is a sedimentary rock formed by the precipitation of calcium carbonate from mineral springs. This process creates a stone filled with countless interconnected air pockets and channels. This natural porosity acts as a form of insulation. When sunlight hits the surface, the heat energy is not efficiently conducted and stored within the stone’s mass. Instead, it is dissipated through the network of voids. Furthermore, any moisture from pool splashes or morning dew absorbed into these pores will create an evaporative cooling effect as it dries, further lowering the surface temperature.
The difference is not trivial. On a hot day, travertine surfaces remain 20-30°F cooler than standard concrete or dense stones like granite in direct sunlight. This is why selecting a material solely based on a light color can be misleading. While a light-colored granite will be cooler than a dark one, it will still become significantly hotter than a light-colored travertine due to its fundamental density. When selecting materials, prioritizing high porosity and low thermal mass is the most effective strategy for ensuring a barefoot-friendly surface for children and pets.
Action plan: Selecting Materials for Heat Management
- Material Porosity: Choose materials with high porosity like travertine, whose interconnected air pockets act as natural insulators.
- Color and Albedo: Select light colors such as ivory and beige that have a high albedo, reflecting more solar radiation than dark tones.
- Evaporative Cooling: Evaluate the material’s ability to absorb small amounts of pool water, which provides a natural cooling effect as it evaporates.
- Thermal Mass Evaluation: Avoid dense materials like granite and slate, which retain heat long after sunset, and favor those with lower thermal mass.
- Barefoot Comfort Test: Request summer temperature data from the manufacturer or conduct on-site heat tests with samples on a sunny day before finalizing your purchase.
Wood or Stone: Which Transition Material Best Connects Grass to Water?
Choosing between wood and stone for the transition from your lawn to the pool’s edge is a decision that impacts aesthetics, function, and flow. The ideal choice depends on the desired relationship between the distinct zones of your backyard. Natural stone, such as large-format travertine or limestone pavers, excels at creating a seamless, continuous plane. When installed correctly, stone can sit nearly flush with the lawn, allowing for a smooth visual and physical transition that feels open and contemporary. This “knife-edge” effect blurs the line between hardscape and softscape, making the entire area feel like one cohesive space.
Wood decking, by contrast, tends to create more defined, elevated zones. Due to its construction on a frame, a wood deck is almost always raised above the grass level, necessitating steps or a ramp. While this can be used to great effect to create distinct “rooms”—a dining area, a lounging platform—it inherently breaks the seamless flow from grass to water. The transition is more deliberate and structured. The warmth and texture of wood offer a different kind of comfort, but it requires a framed edge that clearly delineates the end of the deck and the start of another surface.
A hybrid approach often provides the best of both worlds. By using stone for the immediate pool coping and an adjacent walkway, you gain the durability, slip-resistance, and cool-to-the-touch benefits of stone right where it matters most. This stone path can then dissolve into a larger wood deck area for lounging or dining. This method allows you to zone the space effectively, using the continuous plane of stone for traffic and the warm, elevated feel of wood for relaxation. The following table compares these approaches across key features.
| Feature | Natural Stone | Wood Decking | Hybrid Approach |
|---|---|---|---|
| Edge Condition | Knife-edge, gravel reveal, or floating pavers possible | Requires framed edge, harder transition | Stone coping dissolves into wood deck |
| Grass Interface | Seamless with proper grading | Elevated, requires steps or ramp | Stone pavers create path through wood |
| Heat Retention | Stays cooler (travertine/limestone) | Moderate heat, comfortable barefoot | Zoned comfort areas |
| Maintenance | Occasional sealing, minimal upkeep | Annual sealing/staining required | Mixed maintenance zones |
| Visual Flow | Contemporary, continuous plane | Warm, defined zones | Best of both aesthetics |
How to Eliminate Trip Hazards Between the Coping and Decking?
A seamless, trip-free transition between the pool coping (the edge stone) and the main deck is a hallmark of professional installation and a non-negotiable safety feature. For bare feet, which are far more sensitive than shod feet, even a minuscule height difference can catch a toe and cause a serious fall. In landscape architecture, a clear threshold exists for this danger: architects consider any height difference over 1/4 inch (6mm) a major trip hazard. This hazard often develops over time due to ground settlement or is created during installation through a lack of precision.
The key to preventing this is treating the coping and the deck as a single, unified system built on a shared, stable foundation. The most robust method is to pour a single, continuous concrete substrate that extends from the pool shell outwards, serving as the base for both the coping stones and the deck pavers. This monolithic slab ensures that both surfaces start from the exact same plane and are less likely to settle independently.
During installation, precision is paramount. A laser level must be used to continuously verify a perfectly flush alignment across the joint where the coping and deck materials meet. The joint itself is also critical. While soft caulk might seem like an easy solution, it can degrade, shrink, or sink over time, creating a groove that becomes a new trip hazard. A far superior method is to use color-matched, sand-filled joints or rigid but flexible expansion joint inserts. These maintain a firm, flush surface that can accommodate thermal expansion without creating a dangerous lip. Regular checks with a straight edge during and after installation are mandatory to ensure a zero-tolerance policy for any height variance.
Checklist: Flush Transition Installation
- Shared Substrate: Pour the substrate for both coping and deck as a single, continuous plane before installing any finish materials.
- Laser Level Alignment: Use a laser level throughout the installation process to verify a perfectly flush alignment across the coping-to-deck transition.
- Flexible Expansion Joints: Install rigid but flexible expansion joint inserts that are designed to maintain a flush surface while allowing for material movement.
- Sand-Filled Joints: Choose color-matched, sand-filled joints over soft caulk, as they provide a firmer surface that resists sinking and creating a trip hazard.
- Straight Edge Test: Test every transition point with a straight edge during and after installation, accepting zero tolerance for lips or gaps.
How to bond coping stones to the shell to prevent frost heaving?
The bond between the pool coping and the concrete pool shell is one of the most critical structural joints in a pool system, especially in climates with freeze-thaw cycles. When water penetrates this joint and freezes, it expands with immense force, a process known as frost heaving. This can lift, crack, or completely dislodge the coping stones, creating a dangerous and expensive failure. Preventing this requires more than just standard mortar; it demands a systematic approach focused on material compatibility and water management.
The core of the problem is differential movement. The concrete pool shell, the mortar, and the coping stone all expand and contract at different rates with temperature changes. A rigid, single layer of mortar creates a stress point. The professional solution is a double-bond method incorporating a decoupling membrane. This thin, flexible membrane is installed between the concrete shell and the mortar bed. It acts as a slip sheet, absorbing the differential movement between the substrate and the coping, which dramatically reduces the shear stress on the bond and prevents cracks from telegraphing through.
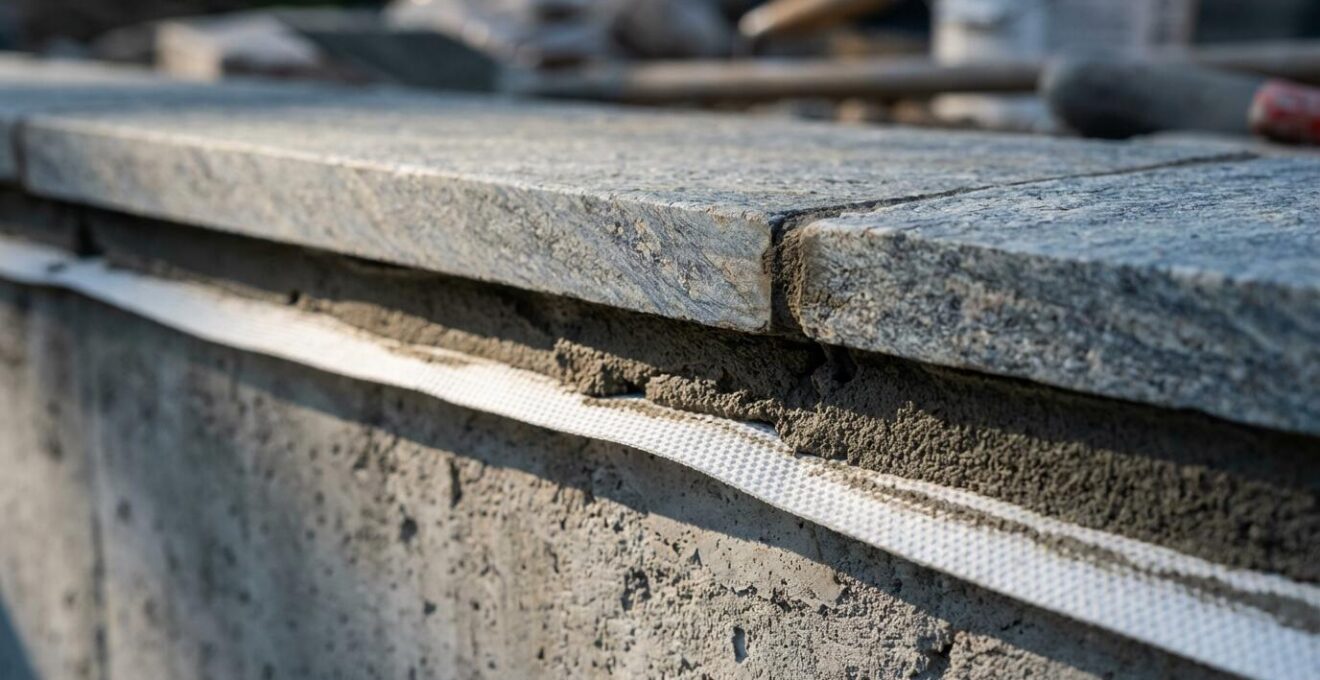
As shown in the detail above, the bonding process itself is also specialized. The first layer of a polymer-modified, frost-resistant mortar is applied to the decoupling membrane using a notched trowel to ensure full coverage on the bottom of the stone. A second, equally important bond is created at the back edge of the coping, where it meets the deck substrate. This comprehensive bonding, combined with proper curing time and the protective action of the decoupling membrane, creates a resilient system that can withstand the powerful forces of frost heaving year after year, ensuring the integrity and safety of the pool edge.
The slope error that sends dirty runoff water back into your clean pool
One of the most common and costly design flaws in pool decks is improper slope. A correctly sloped deck is an essential part of the pool’s hygiene system, designed to direct rainwater, debris, and contaminated splash-out water away from the pool and into designated drains. When the slope is incorrect—or worse, non-existent—this dirty runoff flows back into the clean, chemically balanced pool water. This introduces phosphates, nitrates, bacteria, and dirt, forcing the filtration system to work overtime and dramatically increasing chemical consumption.
To prevent this, building codes are specific and unforgiving. For proper drainage away from the pool, building codes require deck slopes of one-fourth inch to one-half inch per foot (a grade of approximately 1-2%). This subtle, almost imperceptible tilt is enough to ensure gravity effectively pulls water away from the pool’s edge. This slope should direct water towards appropriate drainage solutions, such as channel drains or discreet slot drains installed at the deck’s perimeter.
A critical point of regulation and safety is the complete separation of this drainage system from the pool’s circulation system. Contaminated deck water must never be piped back into the pool’s filtration pumps. As the North Carolina Administrative Code clearly states in its regulations for public swimming pools:
Deck drains shall not be connected to the circulation system in any manner
– North Carolina Administrative Code, 15A NCAC 18A .2522 DECKS regulation
This rule underscores the importance of treating deck runoff as waste, not as water to be recycled. A well-designed system might use a multi-zone drainage plan, with different slopes and drain types depending on the material and proximity to landscaping, but the fundamental principle remains: slope everything away from the pool.
When to widen the pool deck: Guidelines for accommodating loungers and walkways
A common mistake in pool design is underestimating the amount of deck space needed for comfortable, functional use. A deck that is too narrow creates a cramped, awkward environment where walkways are blocked by furniture and there is no room for relaxation. The question isn’t just about total area, but about creating dynamic use zones with appropriate widths. While most functional pool decks require between 600 and 900 square feet of patio space, how that space is allocated is what truly defines its success.
The first step is to analyze how you will use the space and plan for distinct zones. A simple walkway around the pool’s edge has a different requirement than an area intended for sunbathing or dining. A primary traffic path should be a minimum of 4-5 feet wide to allow two people to pass comfortably or for one person to walk past without having to turn sideways. Building codes often mandate a minimum of 36 inches, but this is for safety, not comfort.
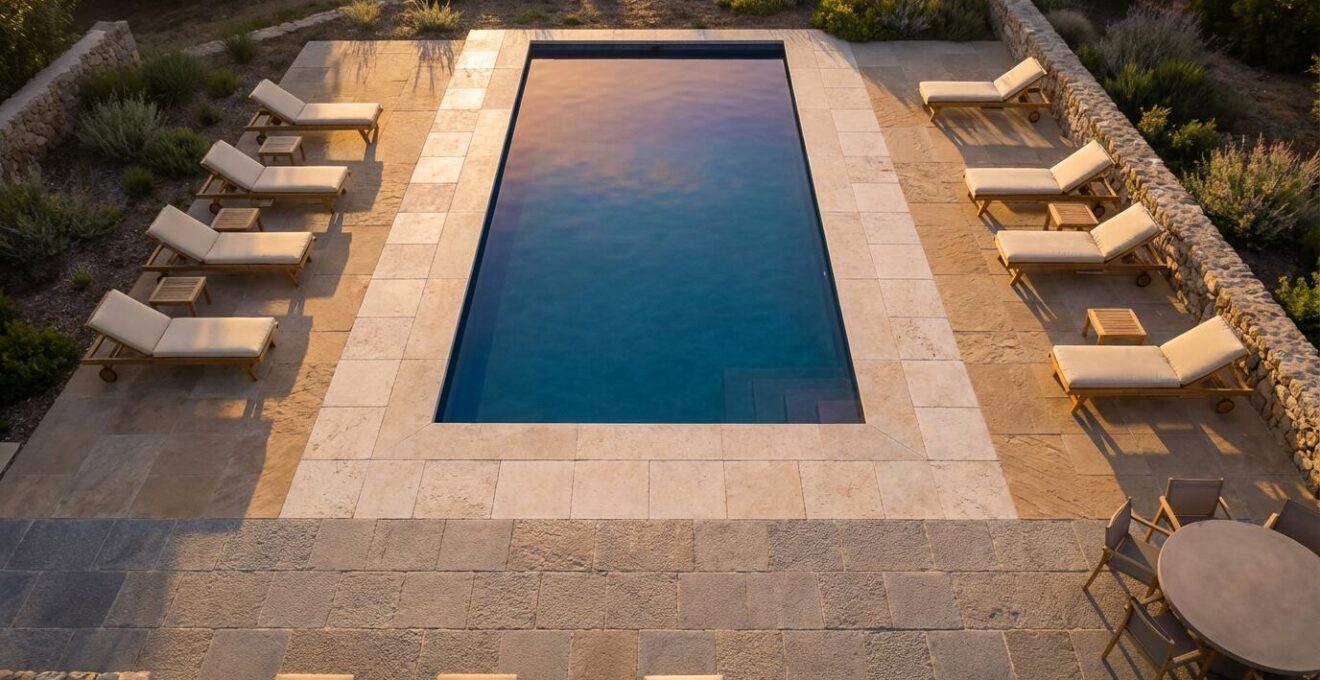
The most space-hungry zone is typically for loungers. A standard chaise lounge is about 6.5 feet long. To place a lounger and still have a comfortable walkway behind it, you need a minimum deck width of 10-11 feet in that area (6.5 feet for the chair + 4 feet for the path). Similarly, a dining area for four to six people requires at least a 12×12 foot clear zone to accommodate the table, chairs, and space to pull chairs out and walk around. By planning these zones in advance, you can widen the deck strategically where needed, rather than building a uniformly narrow and ultimately dysfunctional patio.
This table outlines the recommended widths for creating functional, comfortable zones around your pool.
| Zone Type | Minimum Width | Recommended Width | Special Considerations |
|---|---|---|---|
| Basic Walkway | 3 feet (36 inches) | 4.5 feet | Building code minimum for safety |
| Lounger Zone | 9 feet | 10-11 feet | 6.5′ lounger + 4′ passing space |
| Dining Area | 10×10 feet | 12×12 feet | Table for 4-6 with circulation |
| Primary Traffic Path | 4 feet | 5-6 feet | Allows toweling without obstruction |
| Equipment Access | 42 inches | 48 inches | Code requirement around obstructions |
Key takeaways
- System-Based Design: A safe pool deck is an engineered system where material, slope, joints, and bonding work together to manage heat and water.
- Measurable Safety: Go beyond aesthetics by using objective metrics like DCOF ratings for slip resistance (≥0.60) and maintaining transition tolerances under 1/4 inch.
- Material Science Matters: The best cool-touch materials like travertine rely on physical properties like high porosity and low thermal mass, not just light color.
How to Create a Biophilic Transition That Hides Equipment Without Blocking Access?
The final element in creating a seamless backyard oasis is managing the transition to the surrounding landscape and cleverly concealing the pool’s mechanical heart: the pump, filter, and heater. The goal of a biophilic transition is to integrate these functional necessities into the environment so they disappear, replacing the visual noise of machinery with the tranquility of nature. This is not about building an ugly box, but about using natural forms and materials as functional camouflage.
One of the most effective strategies is using layered plantings and natural stone hardscaping. Instead of a fence, a low, serpentine wall built from natural fieldstone can screen equipment from view while echoing the materials used in the deck or coping. This wall can double as a retaining wall for a raised garden bed filled with lush, dense plantings like ornamental grasses, ferns, or evergreen shrubs. This “living wall” not only hides the equipment but also absorbs sound, reduces the mechanical noise, and aids in drainage and moisture control around the equipment pad.
Access remains paramount. The design must incorporate removable panels, hidden gates, or strategically placed gaps in the planting that allow for easy equipment servicing. For example, a section of a stone wall can be designed as a freestanding, movable piece, or a dense hedge can have an “invisible” gate built within it. By thinking of concealment not as a single barrier but as a series of overlapping natural layers, you can create a solution that is both beautiful and practical, ensuring the transition from the engineered precision of the pool deck to the organic beauty of the garden is truly seamless.
Now that you understand the principles of selecting the right materials and designing a deck system that is safe, comfortable, and beautiful, the next logical step is to apply this knowledge. Begin by auditing your existing space or future plans against these criteria—evaluating material porosity, measuring for slip resistance, and planning for functional zones—to transform your poolside into a true sanctuary for your family.