A mosaic tile failure is not a product flaw; it is a system failure.
- The longevity of your pool’s finish depends on an engineered system of tile, adhesive, and grout working in synergy.
- Technical specifications like epoxy grout, Langelier Saturation Index (LSI), and installation temperature are more critical than the tile’s appearance alone.
Recommendation: Shift your focus from merely selecting a tile to specifying a complete, climate-appropriate installation system.
The vision is always sublime: a shimmering mosaic waterline, a gradient of deep blues descending into the depths, light dancing across an intricate pattern on the pool floor. For owners in freeze-thaw climates, however, this dream can become a maintenance nightmare. The sight of tiles popping off, grout cracking, and a once-perfect surface failing after just a few seasons is a costly and heartbreaking reality. It’s a problem that prompts many to blame the tile itself, searching for a “frost-proof” label as a silver bullet.
The common advice often revolves around surface-level choices: pick a reputable brand, ensure it’s rated for pools, and hire a professional. While not incorrect, this guidance misses the fundamental truth. A tile, no matter how exquisite or expensive, is only one component of a complex, dynamic structure. It is the unseen elements—the adhesive, the grout, the substrate preparation, and even the water’s chemical balance—that truly dictate whether your investment will endure winter’s assault or become a recurring repair bill.
But what if the key to longevity wasn’t in the tile, but in the engineered system that supports it? This guide reframes the selection process. We will move beyond aesthetics to explore the material science and artisanal engineering required for a truly permanent mosaic installation. We will not just tell you *what* to choose, but explain *why* these choices create a synergistic system that can withstand the immense pressures of thermal expansion and contraction.
This article will deconstruct the critical decisions that ensure your pool’s mosaic finish remains as beautiful in its tenth year as it was on day one. We will explore the non-negotiable role of grout, the artistic and safety considerations for design, the chemical secrets to preventing decay, and the environmental factors that can make or break an installation. It’s time to build not just a beautiful pool, but a legacy of enduring elegance.
Summary: The Art of Enduring Elegance: Choosing Mosaic Tiles That Defy Winter’s Wrath
- Epoxy or Cement Grout: Which is Essential for Glass Mosaic Longevity?
- How to create a water color gradient using mixed mosaic blends?
- Why glass mosaic on steps is a safety hazard and how to fix it?
- The water balance secret to keeping dark blue tiles free of white scale
- When to schedule tiling to ensure perfect adhesion temperature?
- How to Use Pool Lighting Colors to Reduce Stress After Work?
- How to Design a Pool Area That Reduces Cortisol Levels?
- How to Upgrade Halogen Lights to LEDs Without Draining the Pool?
Epoxy or Cement Grout: Which is Essential for Glass Mosaic Longevity?
In the engineered system of a pool finish, grout is not a filler; it is the structural web that holds everything together and provides the first line of defense against water infiltration. For glass mosaics in freeze-thaw climates, the choice between traditional cement-based grout and a modern epoxy-based system is not a matter of preference—it is a decision that dictates the lifespan of the entire installation. Cement grout is porous. Over time, it allows water to slowly seep behind the tiles, a process that is disastrous when temperatures drop below freezing. This trapped moisture expands, exerting immense pressure that pops tiles off the wall.
Epoxy grout, by contrast, is the cornerstone of a durable mosaic system. It is a chemically cured, 100% non-porous material. When properly installed, it creates an impermeable barrier that prevents water from ever reaching the adhesive layer. This is not just a marginal improvement; it is a fundamental shift in performance. In fact, professional pool builders confirm that epoxy grout offers a completely waterproof shield, often backed by warranties exceeding a decade. This resilience is what makes it an absolute requirement for any glass tile installation expected to survive harsh winters.
The System Approach: Laticrete Spectralock Pro Performance
Professional tilers report that systems like Laticrete’s Spectralock Pro Epoxy Grout maintain their integrity in swimming pools for decades. The product’s inherent flexibility is key; it accommodates the natural expansion and contraction of glass tiles through temperature swings without cracking. Furthermore, its 100% waterproof formula completely prevents the calcium leaching and efflorescence that plague cementitious grouts, ensuring the tile’s color remains vibrant and free from mineral stains.
The installation of epoxy is more technical and less forgiving than cement, requiring a contractor with specific experience. The mixing ratios and working time must be managed precisely. Therefore, vetting your installer on their epoxy expertise is as crucial as choosing the material itself. A beautiful tile set with the wrong grout is a guaranteed failure.
Your Vetting Checklist: Questions for Your Tile Contractor
- Ask how many epoxy grout installations they’ve completed specifically for submerged glass tiles.
- Request references from pools they installed at least 3 years ago to verify long-term performance.
- Inquire about their specific mixing protocol and working time management for the epoxy products they use.
- Confirm they use flexible epoxy formulations designed to handle the thermal expansion of glass.
- Verify if they hold certifications from leading manufacturers like Laticrete or Mapei for their installation systems.
How to create a water color gradient using mixed mosaic blends?
Creating a watercolor gradient with mosaic tiles is where engineering meets artistry. This technique transforms a pool from a simple container of water into a dynamic, visual experience, mimicking the natural depth transitions of a lagoon or the open ocean. The effect is achieved not with a single tile color, but by methodically blending multiple shades—often three to five—from light to dark. This process requires meticulous planning and is typically designed digitally before a single tile is set.
The blends are supplied on mesh-backed sheets, with the tile percentages carefully calculated. For instance, a transition might start with 100% light blue at the steps, shift to a 50/50 blend of light and medium blue in the shallow end, and finish with 100% dark blue in the deep end. The magic lies in the random distribution of the colors on each sheet, which prevents harsh lines and creates a soft, painterly effect when viewed from a distance. This “soft fascination” is a key element of biophilic design, creating a naturally calming environment.
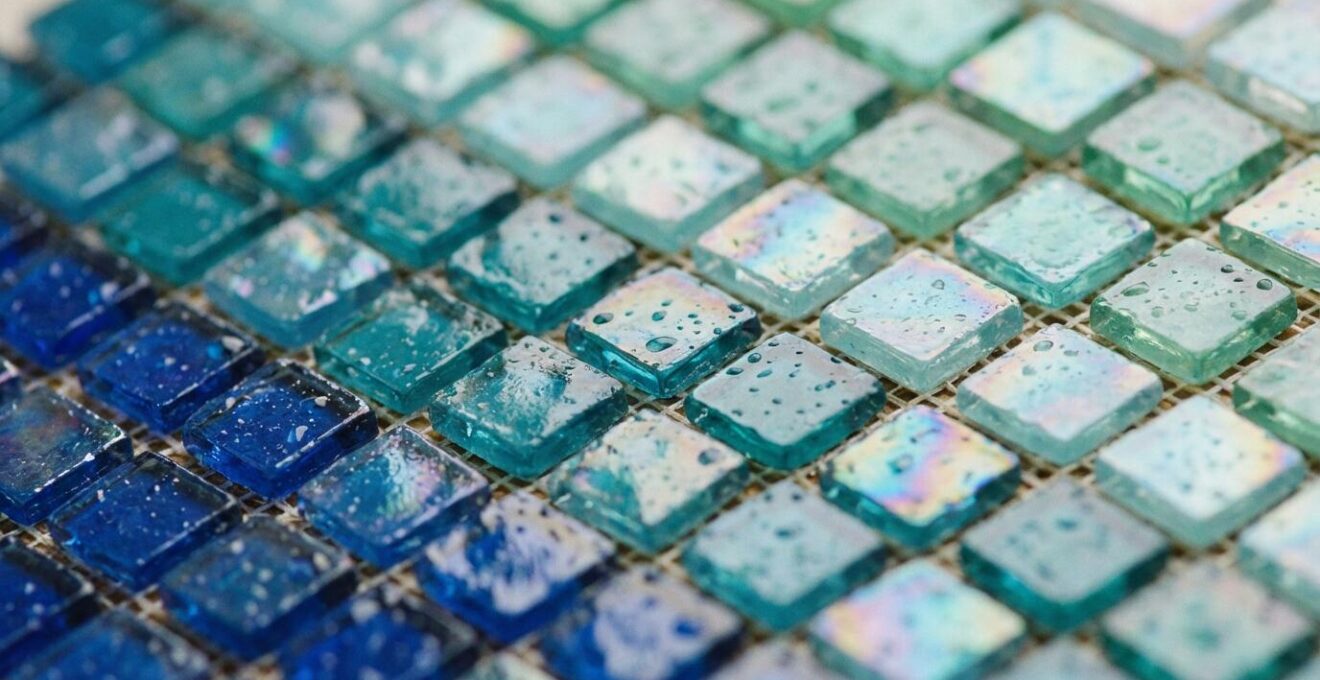
The choice of grout color is also a critical artistic decision that influences the final look. A neutral grey grout tends to unify the gradient and make each individual color pop, which works well for complex, multi-color transitions. Conversely, using a grout that matches one of the mid-tone blues can create a more seamless, monolithic flow, ideal for subtle, monochromatic gradients. A darker grout can enhance the perception of depth, while a contrasting color creates a vibrant, pointillist effect for a more expressive artistic statement. This is a detail to discuss in depth with your designer, as it fundamentally changes the character of the gradient.
Why glass mosaic on steps is a safety hazard and how to fix it?
While visually stunning, using large, smooth glass mosaic tiles on pool steps and benches can pose a significant safety risk. When wet, these surfaces become extremely slippery, increasing the danger of slips and falls. This isn’t just a feeling; it’s a measurable property. Building codes and safety standards specify a minimum level of slip resistance for submerged walking surfaces. Specifically, safety standards require pool step tiles to achieve a DCOF rating of 0.42 or higher. DCOF, or Dynamic Coefficient of Friction, measures the traction of a tile when wet. Many polished glass mosaics fail to meet this crucial threshold.
However, this doesn’t mean you must abandon the beauty of mosaic on your pool’s entry points. The solution lies in applying artisanal engineering to integrate safety directly into the design. The most effective method is to change the tile format. Professional pool designers often specify 1-inch or smaller mosaic tiles for steps. The reason is simple: a smaller tile format dramatically increases the number of grout lines in a given area. These grout lines act as a natural, textured tread, providing a high-traction surface that significantly improves grip underfoot.
Beyond using smaller tiles, several other elegant solutions can be integrated:
- Textured Finishes: Select glass tiles that have a matte or lightly textured finish specifically manufactured for slip resistance.
- Inlaid Strips: A highly effective and beautiful solution is to inlay strips of textured, unpolished stone like flamed granite or honed travertine along the edge of each step.
- Visual Contrast: Use a darker or contrasting color of mosaic tile on the leading edge of the steps. This doesn’t increase physical grip, but it greatly improves visibility, helping swimmers better judge a step’s location.
- Dedicated Nosing: Install sleek, integrated anti-slip nosing profiles that are designed to work seamlessly with mosaic tile installations.
This thoughtful approach ensures that the pool’s entrance is as safe as it is beautiful, proving that luxury design and user safety can and should coexist.
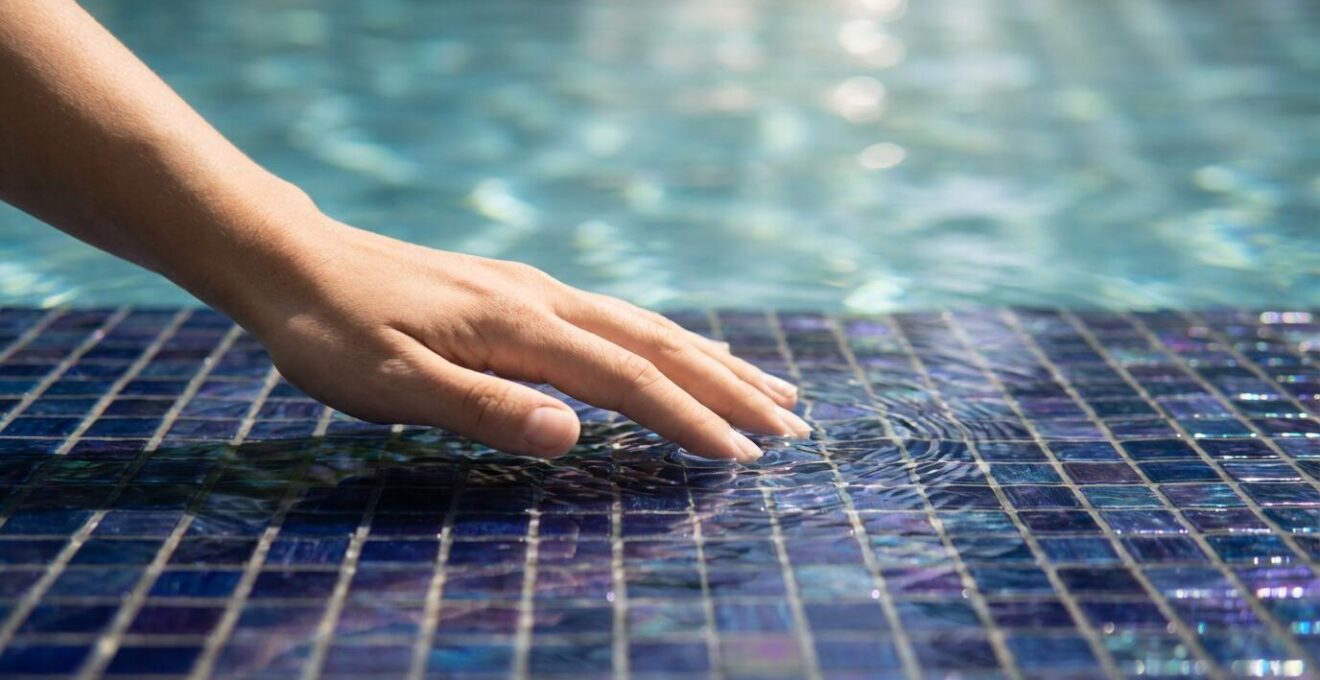
The water balance secret to keeping dark blue tiles free of white scale
One of the most frustrating issues for owners of pools with dark, rich mosaic tiles is the appearance of a hazy, white film known as scale. This is calcium carbonate precipitating out of the water and depositing onto the tile surface. On light-colored pools, it’s barely noticeable, but on deep blues, blacks, or greens, it can ruin the aesthetic. The common response is to scrub the tiles or add clarifying chemicals, but these are temporary fixes for a deeper problem: imbalanced water chemistry.
The true secret to preventing scale lies in managing the Langelier Saturation Index (LSI). The LSI is a comprehensive calculation that determines if your pool water is corrosive (etching surfaces), balanced, or scaling (depositing minerals). It goes beyond a simple pH test, factoring in pH, total alkalinity, calcium hardness, water temperature, and total dissolved solids. For protecting dark, expensive tiles, maintaining a balanced LSI is non-negotiable. Specifically, pool chemistry experts recommend maintaining an LSI between 0.0 to +0.3. In this narrow, slightly positive range, the water is saturated enough to not be aggressive but not so saturated that it will precipitate calcium scale.
Achieving this perfect equilibrium requires diligent management of several key parameters. Your calcium hardness should be maintained between 200-400 ppm to provide proper saturation. Total alkalinity, the buffer for your pH, should be kept between 80-120 ppm. The pH itself should be targeted in the 7.4-7.6 range. Critically, water temperature must be factored into the LSI calculation, as warmer water is more prone to scaling. Proactively using a weekly dose of a sequestering agent can also help by chemically “locking up” minerals in the water, preventing them from precipitating onto your beautiful tile.
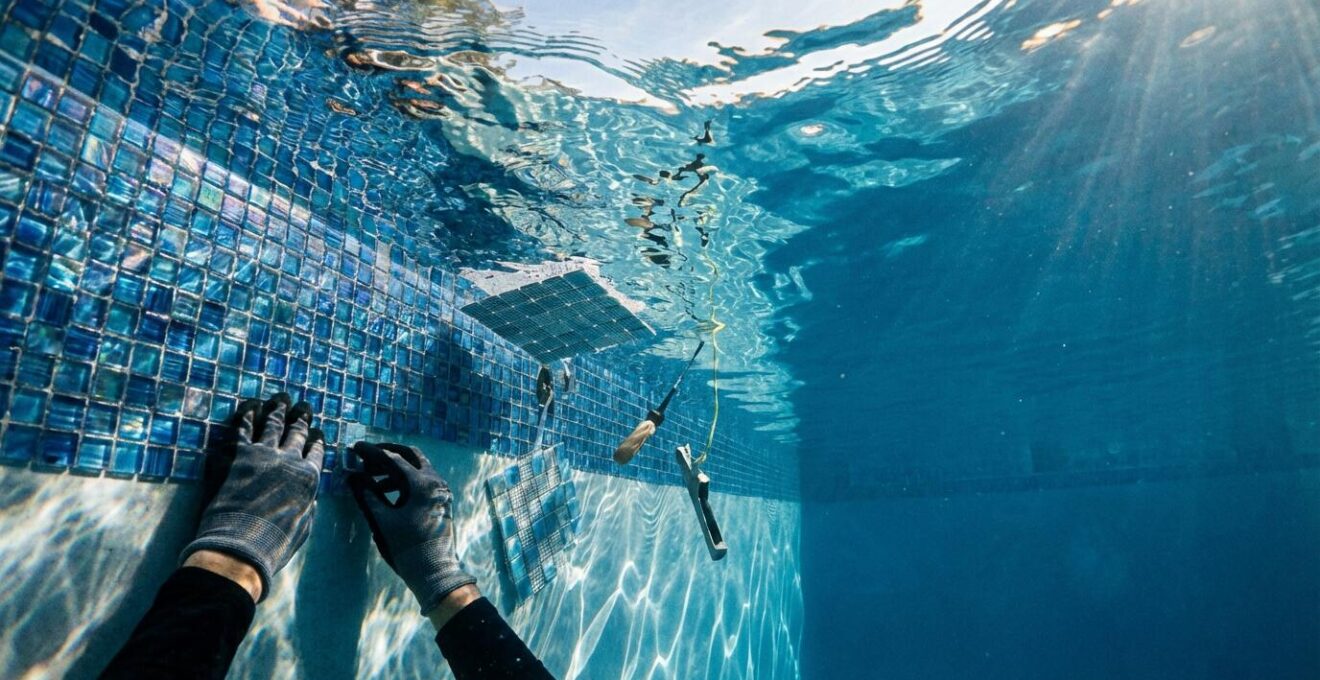
When to schedule tiling to ensure perfect adhesion temperature?
The most robust epoxy grout and the most expensive glass tile will fail if the installation occurs under the wrong environmental conditions. The curing of setting materials—the thin-set mortar and the grout—is a chemical reaction that is highly dependent on temperature and humidity. Scheduling your tiling work during the right time of year and managing the site environment are critical factors for achieving a permanent bond, especially in climates with wide temperature swings.
There is a “Goldilocks” window for this type of work. In general, professional installers recommend substrate temperatures between 50°F and 90°F (10°C and 32°C). If the temperature of the pool shell is too cold, the chemical reactions in the mortar and epoxy will slow down dramatically, preventing a full and proper cure. This results in a weak bond that is destined to fail. Conversely, if the substrate is too hot, often from direct sunlight exposure, the moisture in the setting materials can evaporate too quickly. This is known as “flash curing” and it, too, prevents a full-strength bond from forming, leading to delamination and tile failure.
Experienced installers are masters of managing these thermal dynamics. They know that a successful installation requires protecting the pool from direct sun, extreme heat, wind, and rain throughout the entire process, from substrate preparation to the final curing of the grout. A key tool of the trade is a simple infrared thermometer. Before applying any adhesive, a true professional will verify the temperature of the concrete shell to ensure it’s within the manufacturer’s specified range. If necessary, they will erect tents or sheeting to create a controlled environment, shielding the work area from the elements. This attention to detail is a hallmark of a master craftsman and is essential for guaranteeing that the chemical bond achieves its maximum design strength.
How to Use Pool Lighting Colors to Reduce Stress After Work?
The role of a luxury pool extends beyond recreation; it is a space for decompression and mental wellness. Modern LED lighting technology allows you to transform your pool’s ambiance at the touch of a button, using color psychology to actively reduce stress. The interaction between light, color, and water can create powerful therapeutic effects, turning your evening swim into a restorative ritual. The key is to program light scenes that align with your desired mental state.
For winding down after a stressful day, cool colors are most effective. As noted by industry experts, the right color and water texture can create distinct moods. In the Kings Outdoor Lighting Technical Guide, Pool Design Professionals state:
Blue and green light on a pool with smooth surface creates calming effects, while water jets with the same light create energizing shows.
– Pool Design Professionals, Kings Outdoor Lighting Technical Guide
Blue light, particularly in the 470nm wavelength, is known to have a tranquilizing effect, promoting relaxation and a sense of peace. Programming your pool lights to a steady, deep blue can create a serene environment perfect for quiet floating or gentle laps. Similarly, a slow, gentle transition from a warm amber to a soft green can mimic the progression of a natural sunset, a powerful biophilic cue that signals to the body and mind that it is time to relax. The texture of your mosaic finish plays a role, too; a matte or lightly textured tile will diffuse the light, creating a soft, uniform glow that is more calming than the sharp reflections off a high-gloss surface.
To maximize this effect, consider creating specific “stress reduction” programs with your lighting system. This could involve setting dedicated zones, with softer, static light in a relaxation area or spa, and slightly more dynamic color washes across the main body of the pool. The ability to fine-tune RGB LEDs to match or complement the hues in your mosaic tile allows for a fully integrated and deeply personal wellness experience.
Key Takeaways
- A durable mosaic finish is an engineered system; the tile, adhesive, and grout must be chosen for synergy.
- Epoxy grout is not optional in freeze-thaw climates; its waterproof nature is the primary defense against tile failure.
- Water chemistry, specifically the Langelier Saturation Index (LSI), is a proactive tool to prevent scale and protect your investment.
How to Design a Pool Area That Reduces Cortisol Levels?
A truly luxurious pool area is more than just a place to swim; it is a sanctuary designed to actively soothe the nervous system and lower cortisol, the body’s primary stress hormone. This is achieved through biophilic design, a practice that incorporates natural elements and patterns to create a restorative environment. The choice of mosaic patterns and colors can play a profound role in this process, transforming your pool into a therapeutic landscape.
The key is to create what scientists call “soft fascination,” a state of effortless attention captured by natural, non-threatening stimuli. Instead of stark, repetitive geometric patterns, opt for mosaics that mimic the organic, fractal patterns found in nature. These are the complex yet ordered patterns seen in things like wave ripples, leaf veins, nautilus shells, or the dappled light through a canopy of trees. Our brains are hardwired to be calmed by these forms.
Biophilic Mosaics and Stress Reduction
Design experts at Mozaico have found that pools incorporating these natural fractal patterns—such as flowing wave designs or even detailed turtle shell mosaics—trigger a state of soft fascination that has been shown to lower stress. Similarly, color gradients that transition from a sandy beige at the steps to a deep blue in the main pool psychologically mimic a natural beach, tapping into innate relaxation responses associated with coastal environments.
The placement of these intricate patterns is also strategic. While a full-pool fractal design can be stunning, placing a highly detailed mosaic band at the waterline is particularly effective. This allows swimmers to focus on the intricate design while floating or doing laps, providing a meditative focal point. The interplay of sunlight and water movement across these organic patterns creates a constantly shifting, mesmerizing display that gently holds one’s attention without demanding it, allowing the mind to wander and de-stress. By thoughtfully integrating these naturalistic designs, your pool becomes a powerful tool for daily wellness.
How to Upgrade Halogen Lights to LEDs Without Draining the Pool?
Upgrading from old, energy-intensive halogen pool lights to modern, versatile LEDs is one of the most impactful improvements you can make. LEDs offer vastly superior energy efficiency, a much longer lifespan, and the ability to produce a stunning spectrum of colors. Many pool owners delay this upgrade, assuming it requires the costly and time-consuming process of draining the pool. However, for most standard pool light niches, the upgrade can be performed by a qualified electrician or pool technician without removing a single drop of water.
The process involves the technician carefully unscrewing the single screw that holds the light fixture in its niche. The entire sealed fixture, with its long waterproof cord, can then be brought up to the pool deck. There, the old fixture is disconnected at the junction box and the new LED fixture is wired in. The new light is then carefully guided back into its niche and secured. It’s a surprisingly straightforward process for a trained professional. One critical consideration during this upgrade is the change in how light renders color. The upgrading from halogen to LED typically involves a 3000K to 5000K color temperature change. A warm halogen light might make your blue tiles look slightly green, while a cool white LED will reveal their true, crisp blue hue. This can be a dramatic and beautiful change, but it’s worth testing first.
To avoid any surprises, it’s wise to follow a simple testing protocol before committing to a full upgrade:
- Purchase a single, high-quality waterproof battery-operated LED puck light.
- At night, place this test light in the water near one of your existing halogen lights for a direct, side-by-side comparison.
- Observe how the cool white light of the LED interacts with your specific mosaic tile color. Does it enhance it as you expect?
- Consider investing in RGB (Red, Green, Blue) LEDs, which give you the ultimate flexibility to adjust color temperature and create custom scenes.
- Document the appearance with photos so you can make an informed decision before purchasing all the new fixtures.
This simple test ensures your new lighting system will perfectly complement the artistry of your mosaic tile work.
To truly bring this vision of enduring elegance to life, the next step is to begin a dialogue with a certified tile installer who speaks the language of both artistry and artisanal engineering. They will be your most valuable partner in building a pool that is a lasting work of art.
Frequently Asked Questions on How to Choose Mosaic Tiles That Won’t Pop Off After Three Winters?
Which mosaic patterns are most calming?
Organic, non-repeating patterns like fractals found in nature are the most calming. This includes designs that mimic wave patterns, leaf veins, or flowing water, as they induce a state of “soft fascination” that lowers stress.
How do color gradients affect stress levels?
Gradients that transition from light to dark blue are particularly effective at reducing stress. They mimic the appearance of natural water bodies like oceans or deep lakes, which triggers innate relaxation responses in the brain.
Where should complex patterns be placed?
For maximum therapeutic effect, intricate and complex mosaic patterns should be placed at the waterline. This position allows swimmers to focus on the designs while floating or doing laps, providing a meditative focal point that helps calm the mind.